EGD Meeting Scheduler Template
Sent on February 10th, 2023.
If you aren’t a subscriber to EGD News, you can subscribe here.
Don’t you just hate scheduling a meeting with a bunch of people? Especially when you need to coordinate which slots are the ones that are available and which aren’t. I’ve used Doodle previously, and it’s painful. Doodle is littered with ads; you are pressing a button, and that button leads you to an advertiser’s website.
When I joined Fingersoft’s board of directors in 2021, CEO Jaakko started using a scheduler tool I had never seen before. It was a Google Spreadsheet where you’d pick which times work for you from the dates specified by the CEO.
I recently asked Jaakko if this would be something I could share as a tool on EGD, and he gave me the green light. So here we are.
The EGD Meeting Scheduler
To get your copy of the Scheduler, you can go here. Let’s go through this one step by step.
First, get your own copy
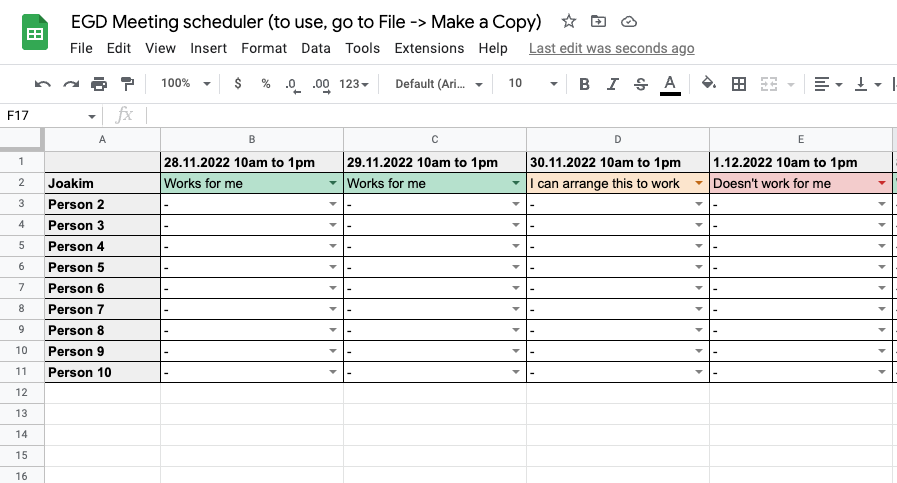
You can head over to the Google Spreadsheet by going here. Once you open it on your browser, head to the File menu and “Make a Copy.” Once you have made your own copy on your Google Drive, you can start playing around and editing things freely.
In the template, I’ve created six columns of date options and ten people who are participating in the meeting to be scheduled. After these instructions, you will know how to add and remove dates and people from your scheduler.
Before you start playing around, I suggest creating another copy for testing and keeping one copy clean. The template contains some bits and pieces that could break, and you don’t want the only copy being broken.
The above video helps you to play around with the scheduler. Please read on to understand how it works.
How the cells work
Let’s first focus on the cells that make up the options “Works for me,” “Doesn’t work for me,” and “I can arrange this to work.” These are the ones that participants in the meeting will be picking as their options.
Under the hood, the cells aren’t that special. To find out how they work, you can hover your mouse cursor on top of B2, which in the template is a green-colored cell with the text “Works for me.” Right-click to reveal the cell-specific menu. From there, I will cover two sections that make up the functionality of the cells.
Dropdown. Select “Dropdown” from the right-click cell menu. Here you will see the options that the dropdown menu contains. If you are operating a non-English team, i.e., Finnish which was the one we use at Fingersoft, you can replace the three options. Note! In the conditional formatting, you will need these three options in the following section.
Conditional format rules. These are the rules that govern the coloring of the cell. Select “View more cell actions” from the right-click cell menu to take a look. Then, select “Conditional formatting.” You will see the three rules for green, yellow, and red. If you remove one of the rules, the coloring will become disabled for the option. With these rules, you must use the exact words specified in the dropdown section. Otherwise, the colors won’t work.
To add more dates or move things around, Google Sheets will bring along the dropdown and rule specifications. Copying and pasting a cell will work.
Scheduling a meeting
Once you’ve built a scheduler for a particular meeting, you can share this with all participants. You can do that by clicking “Share” at the top-right corner of Google Sheets. As you add people to the list, make sure to give editor rights to the participants. That way, they can pick the contents of the dropdown cells.
Final tips
Here are a few tips that will improve things, ones I’ve seen quite important when using a scheduler like this.
- Make sure to specify the timezone of the selected dates.
- Specify a deadline for everyone to place their preferred dates. Three days for scheduling is usually fine. You don’t want to make the timeframe any longer as people’s calendars could start filling up, and the options they’ve specified here might not be available anymore.
- Share this scheduler template. I think many people will be pleased to use the template, so make sure to share the link to the template with all your friends.
Here’s the link again to the spreadsheet. I hope you find it useful.